Making the Top-bars
I thought for a bit about how I wanted to make my top-bars. Most people have some type of comb guide to try and get the bees to build the comb where you want them too. There are many types of comb guides though. Commonly, people attach a wedge or triangle shaped piece of wood to the top-bar to act as the guide. I wanted a simple, cheap, sturdy, and preferably one piece design. I came up with a design that so far has worked nicely and can easily be made using a table saw. It is also pretty quick and cheap.
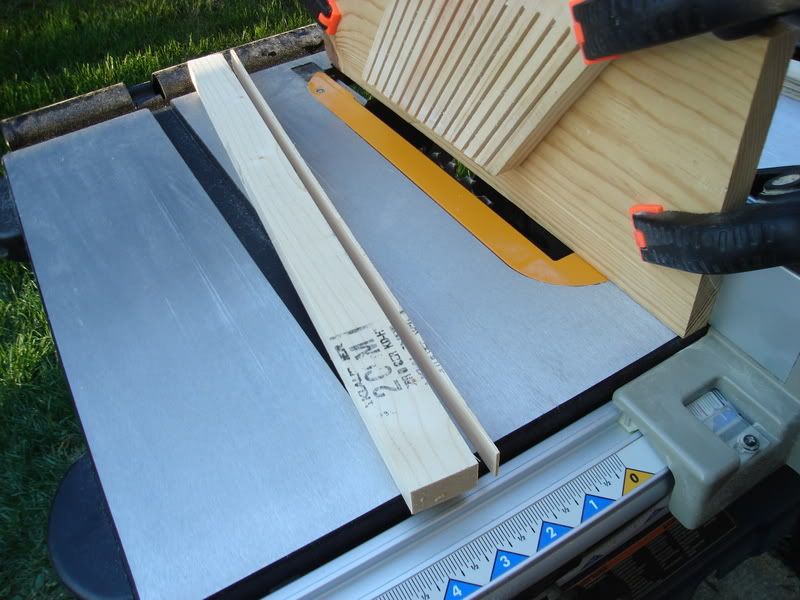
In order to make my top-bar safely, I first made a couple of feather boards. These will hold the top-bar down and against the rip fence while they are cut. They were made from some scrap wood I had. You can also buy feather boards. If you have a table saw, I suggest either getting or making some. They are useful and improve safety.
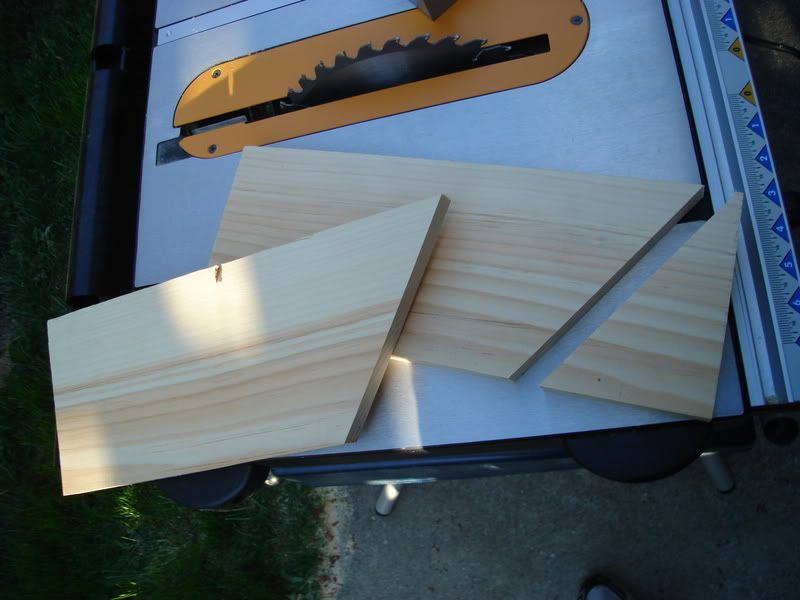
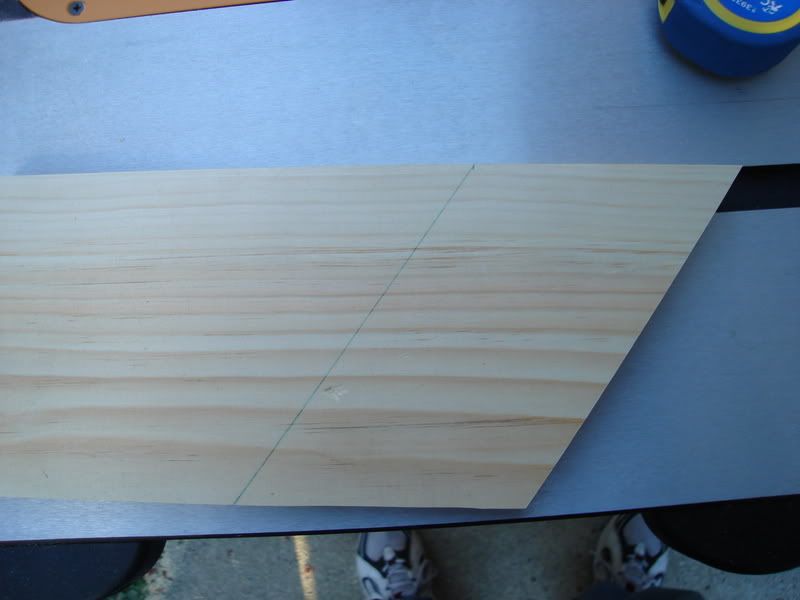
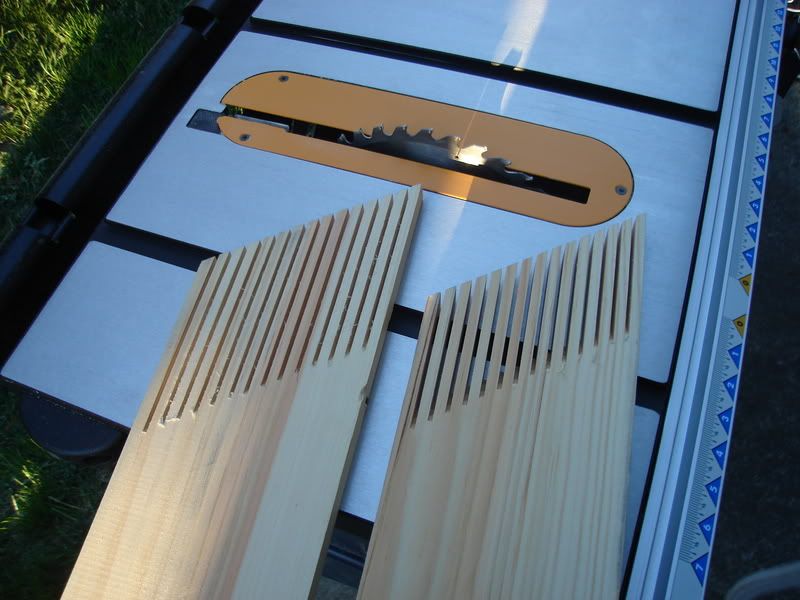
I took two pieces of scape wood, and cut the ends on an angle (I used 35 degrees). I then marked a parallel line a few inches back from the end. This line serves as a stop line when making cuts. Using the rip fence set at varying distances from the blade, I cut slots leaving fingers that were 3/8″ thick (stopping at the stop line). One of these will be used to hold the top-bar down, the other will hold it against the fence.
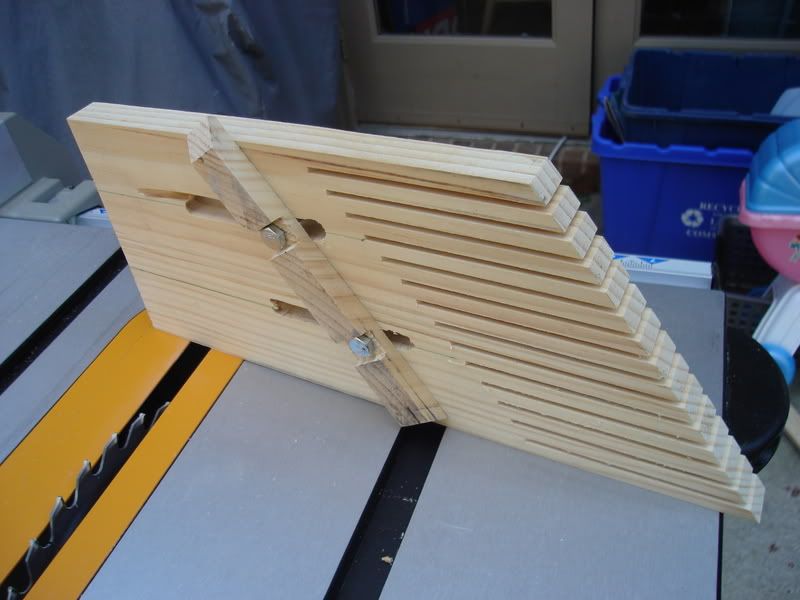
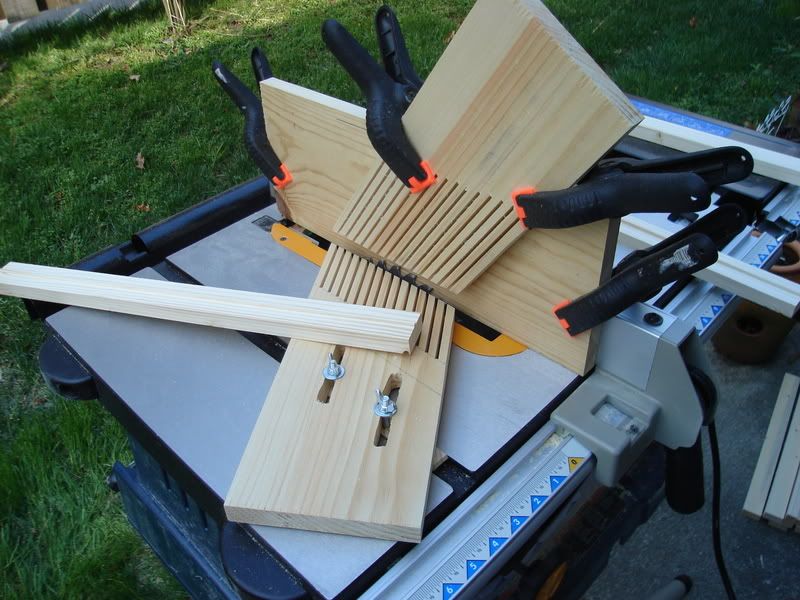
In one of the feather boards, I cut slots and made a attachment that would fit in the miter slot of the table saw (it’s a 3/4″ thick piece of scrap attached with bolts – the miter slot is ~3/4″ wide). This allows you to attach the feather board to the top of the table saw and adjust its distance to the blade. The second picture above show how they are used. The feather boards are used at an angle so that they flex as they hold the the wood down (or to the fence), this way they also keep the wood from moving backward. By only allowing the wood to move forward, they prevent kickback. They also mean that you can keep the your fingers and hands well clear of the blade while still holding the wood firmly in place.
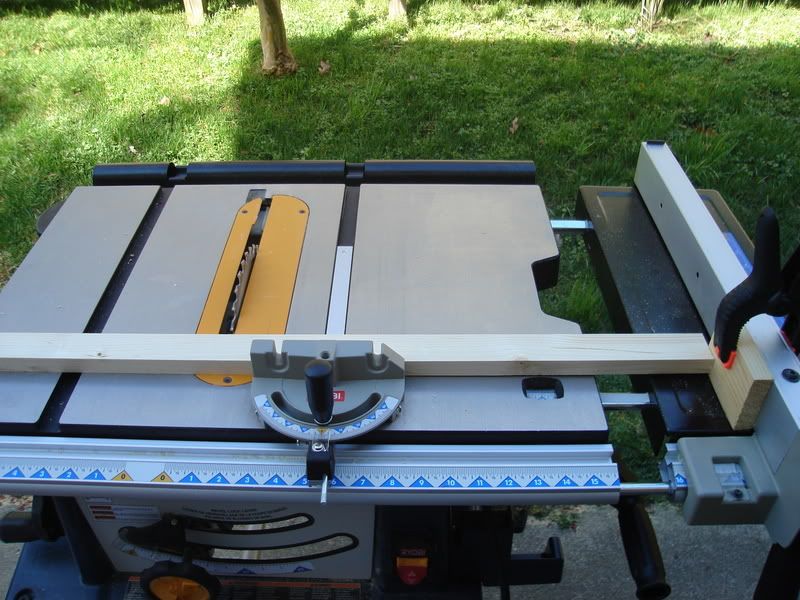
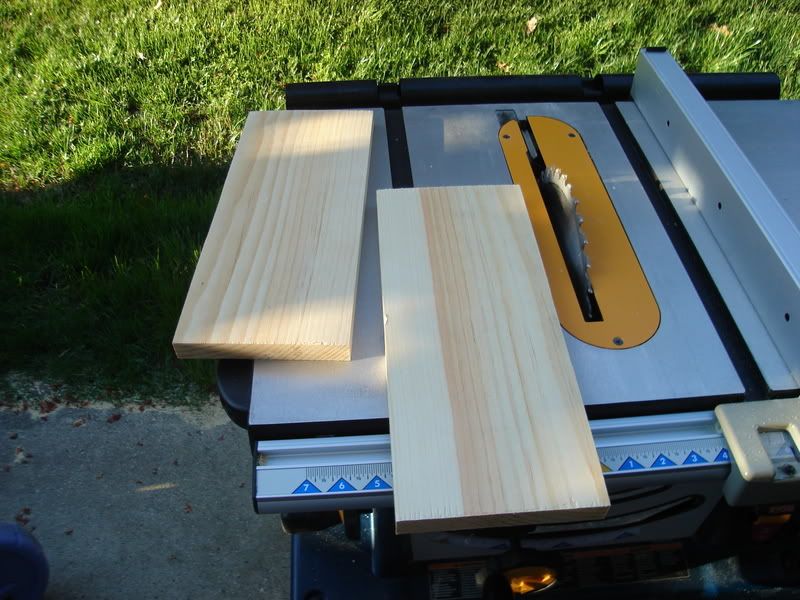
At my local home improvement store, I carefully chose the best, straightes, 1×2’s I could (note that a 1×2 is actually 3/4″ x 1 1/2″). Using a stop block (attached to the fence to prevent kickback on a crosscut), I cut the 1×2’s to 19″ long. By using 19″ top-bars, these bars will also fit inside a Langstroth hive if I wanted to transfer some comb.

The fence was set up with a board clamped to it (as a sacrificial fence). The blade is set right up against this and at a height that is less than 3/4″ (less than half the width of the 1×2). The 1×2 is pushed through with its 3/4″ side down and its 1 1/2″ side against the sacrificial fence (the feather boards are set to hold it this way). This trims about 1/8″ (the width of the blade) from a little less than 1/2 of one side. It is then run through a second time rotated 180 degrees. This will leave a 1/8″ high guide down the center. I usually try it first with the blade set low, and adjust it up until the guide that is left is about 1/8″ thick (as well as 1/8″ high). Once everything is set up, you can cut the guides pretty quickly (30 top-bars in 15-20 minutes or so).
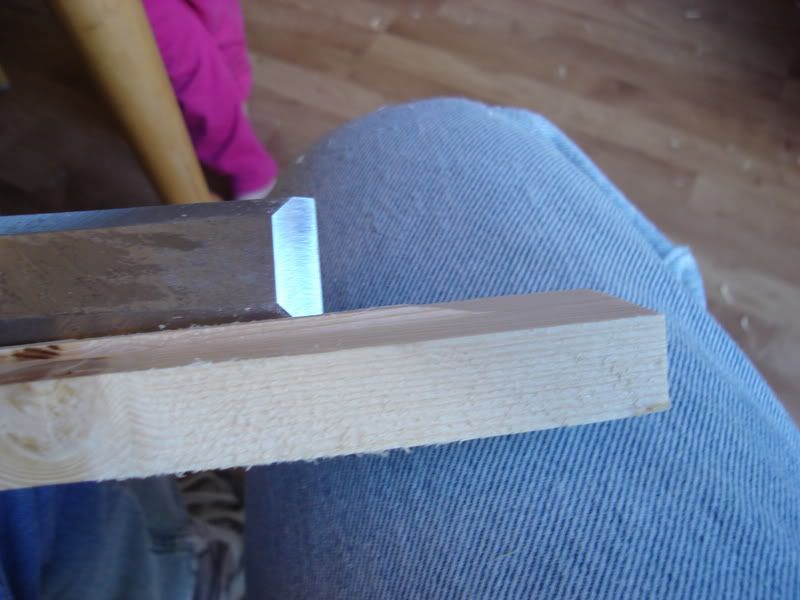
In order for the top-bar to sit flatly in the hive, you need to remove the guide at the ends. I did this easily with a chisel.
This procedure will make 1 1/2″ wide top-bars. I made a mix of 1 1/4″ and 1 1/2″ top-bars since bees build comb of different thickness depending on use. The 1 1/4″ bars are for the brood nest while the 1 1/2″ bars are for honey storage (at the back of the hive). My hives hold 30 top-bars, so I made 32 or 33 of each size. That gives me enough to use 15 of each size in each hive with a few extra.

The 1 1/4″ top-bars are made in much the same way, but they have 1/4″ cut off of the side before the guide is cut. This is done with only the the top feather board. I suggest using a push stick to push it through ( to keep your finger far from the blade). Keep the thin scrap. They are useful as shims in the hive to fit all the top-bars correctly. Once it has been cut down to 1 1/4″ thick, you run it through the same procedure to cut the guide. The height of the blade needs to be dropped though since it is now 1 1/4″ instead of 1 1/2″.


April 23, 2009 at 6:39 am |
hey there!
I really like your bit here on the top bar hives. I’m getting bees today for two Kenyan TBH’s that I built. (I also built a top bar feeder you may find useful). If you are interested in pictures you can see them on my Facebook page or I’d be happy to e-mail them.
I must confess that I am a complete novice when it comes to bee keeping though I am very much looking forward to it all.
Mike Pewtherer
July 20, 2009 at 9:54 am |
The bees took well to the hives and now each have about 9 frames filled with both brood and honey.
October 24, 2009 at 7:18 pm |
Lost one of the hives..it had constant troubles….bad queen, got flipped over in a flood and then taken out by a critter. Made a new feeder for the surviving hive and will look in on them tomorrow Oct 25 2009.
Look me up on Facebook to see pictures of the top bar hives and feeders etc.
June 8, 2011 at 6:34 am |
[…] Wood guide carved out of the topbar itself. This can take many forms, and it is the current method suggested by one of our favourite Topbar Visionaries, The Barefoot Beekeeper. The hive plan is pretty light on instructions for carving this guide, though. I particularly like the elegant solution presented by Sean at Top-Bar Bees […]
February 5, 2014 at 12:13 pm |
I am also planning to make top bars of this design,but i am not quite getting the details. If you have a video, please send at cuarif@gmail.com. Thanks.
August 13, 2015 at 10:28 pm |
HI My name is Greg from alabama I have just built a top bar hive and was wondering if when you get your bees do you have to put in all your top bars since you have the two follower boards or can you start with say like 10 top boards and add on as needed?
Thanks